
JoyStick Breakout Module Shield for PS2 Joystick Game Controller For Arduino

| รหัสสินค้า | SWS-304-1 |
| หมวดหมู่ | Arduino Module |
| ราคา | 16.00 บาท |
| น้ำหนัก | 21 กรัม |
| สถานะสินค้า | พร้อมส่ง |
| ลงสินค้า | 17 ก.ค. 2559 |
| อัพเดทล่าสุด | 1 มี.ค. 2568 |
| จำนวน | ชิ้น |

รายละเอียดสินค้า
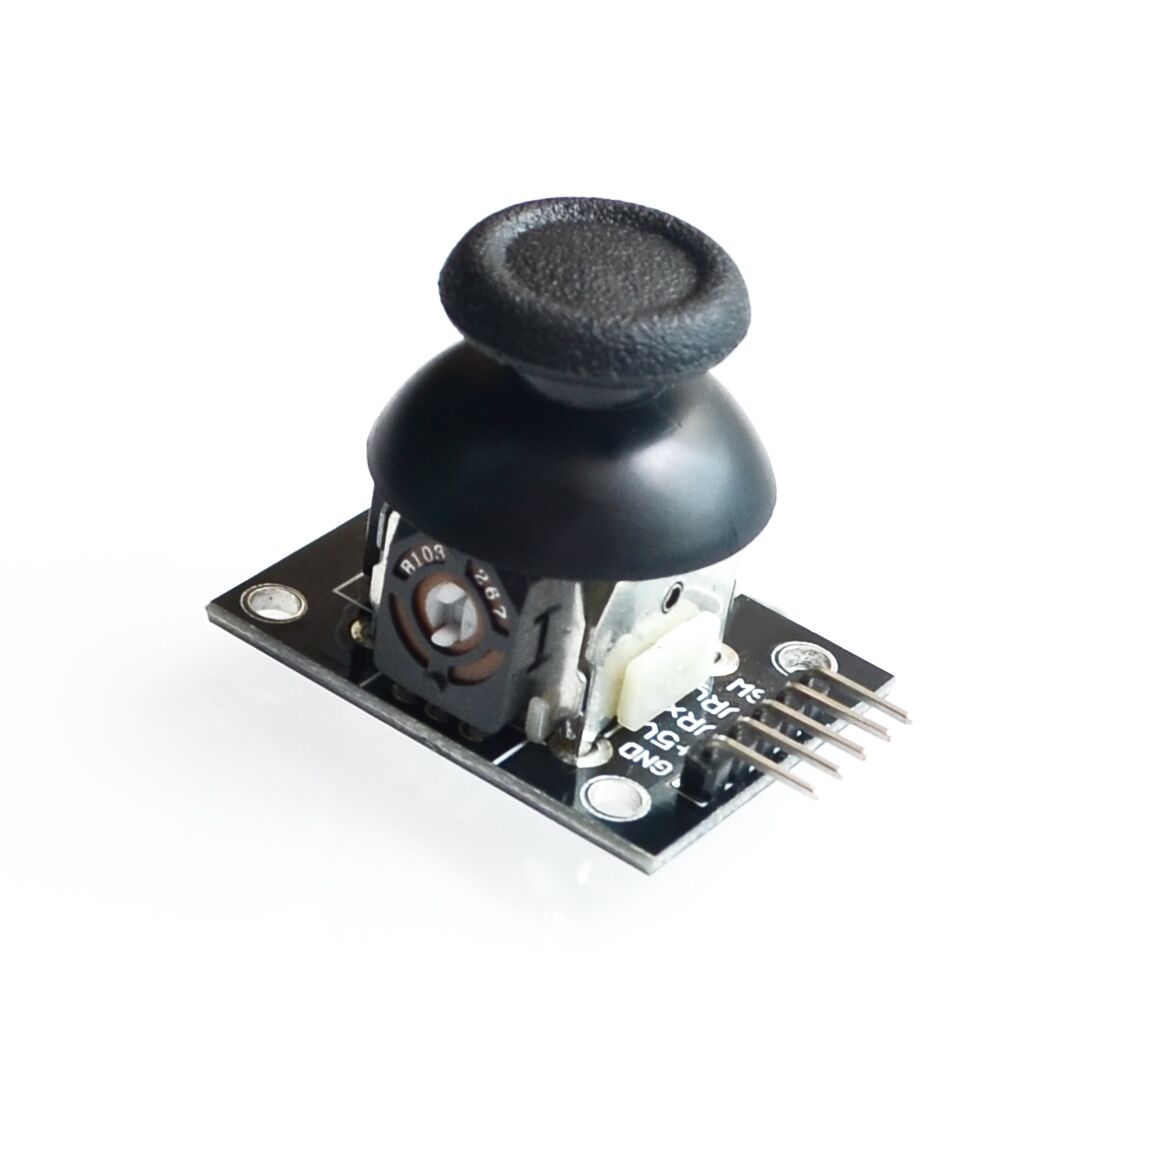
Arduino biaxially joystick button PS2 joystick lever JoyStick electronic building blocks
Product parameters:
Product Name: Rocker Module (Double Axis Button Rocker)
Product size: 34.0 mm * 26.0mm* 32.0mm ( length x width x height)
Color: Black Product Weight: 11.0g (including packaging)
Packing: Single module electrostatic bag packaging Material: FR4+ electronic device
Product introduction:
The dual-axis button rocker sensor module is made of PS2 rocker potentiometer with (X, Y) 2-axis analog output and (Z) 1-way button digital output. With the Arduino sensor expansion board, you can create interactive works such as remote controls. In addition, in order to make it easier for customers to cooperate with standard interfaces such as arduino expansion boards, the X, Y, and Z axis circuits are separately designed. Users can use the 3-pin ARDUINO dedicated cable to plug into the expansion board. Use it.
Product performance:
1. Input voltage range: DC 3.3V to 5V
2. Output signal : The module has two analog output and one digital output interface. The output values correspond to (X, Y) two-axis offset respectively, and the type is analog; the button indicates whether the user presses on the Z-axis. Its type is digital switching.
3. It can be programmed by Arduino controller, and the sensor expansion board can be plugged in to complete the creative remote interactive work.
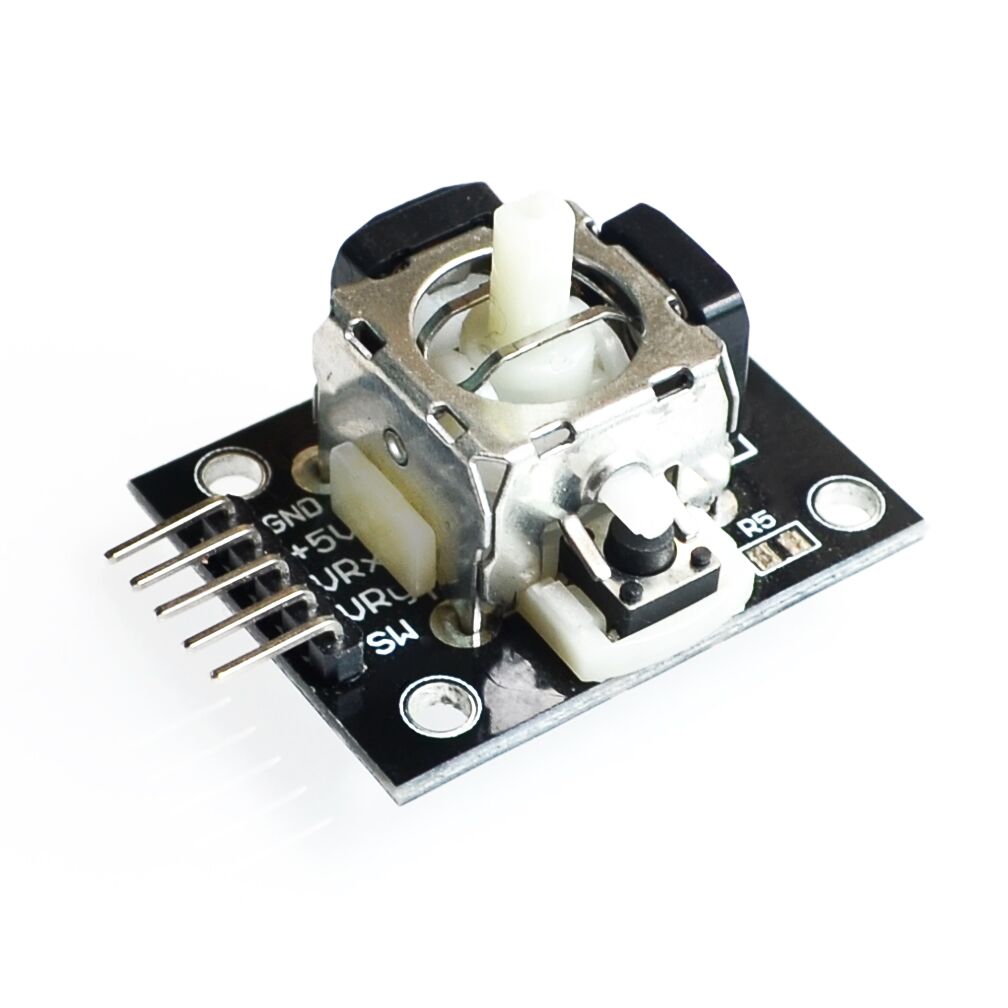
4. The cross rocker is a bidirectional 10K resistor, and the resistance of the tap changes with the direction of the rocker. This module uses 5V power supply. In the original state, the X and Y read voltages are about 2.5V. When pressed in the direction of the arrow , the read voltage value increases with the maximum value to 5V. When the arrow is pressed in the opposite direction , the read voltage value decreases. The minimum is 0V.
Use the tutorial:
Before we introduce how to use it, let's first look at how it works. This is very helpful for our use. Here is a function diagram: In fact, this module is a potentiometer, and the data output of x and y dimensions is analog. The voltage value read by the port. The figure does not show the z-dimensional data output. The z-dimensional only outputs 0 and 1, which can be achieved with one button. All in all, it is a combination of a potentiometer and a button. It is used under the Arduino. In the x and y dimensions, we receive two analog ports to read their values, while in the z-dimensional we receive the digital port and connect the power and ground.
test program:
int JoyStick_X = 0; //x
int JoyStick_Y = 1; //y
int JoyStick_Z = 3; //key
void setup() {
pinMode(JoyStick_X, INPUT);
pinMode(JoyStick_Y, INPUT);
pinMode(JoyStick_Z, INPUT);
Serial.begin(9600); // 9600 bps
}
void loop() {
int x,y,z;
x=analogRead(JoyStick_X);
y=analogRead(JoyStick_Y);
z=digitalRead(JoyStick_Z);
Serial.print(x , DEC); Serial.print(",");
Serial.print(y , DEC); Serial.print(",");
Serial.println(z , DEC);
}
*
*
วิธีการชำระเงิน
ชำระเงินผ่านธนาคาร
ชำระเงินด้วยการ Scan QR


ชำระเงินออนไลน์
- ค่าธรรมเนียม 3.9% + 11 THB
- การชำระผ่าน PayPal คุณไม่จำเป็นต้องแจ้งชำระเงิน เนื่องจากระบบจะจัดการให้คุณทันที ที่คุณชำระเงินเสร็จสมบูรณ์
MEMBER
Join เป็นสมาชิกร้านค้า


- พิมพ์ “mcucity” ในช่อง Search
- หรือเข้าจากรายการร้านค้าโปรดของฉัน
